1. Introduction
Hai, it's your favorite Dokyeom stan Soogi ♡ 
This guide will explain how to add new or modify existing card decks in the randomizer, at least until the randomizer is revamped with a nice and shiny backend.
Because the app currently does not have a backend and everything is stored in files within the app you
will have to make changes directly in the code if you want to add or modify cards. No worries though, I'll keep it super simple so there's no coding knowledge required and you can always message me if you have questions!
Let's get
started then~ 
2. Access the code
The source code is available in a private repository on Github. I won't go into detail about git or anything, we'll just be using the Github website to do everything in this guide. Anyway, to access the source code, I will first have to add
you to the Github repository as a collaborator so create an account and DM me your username. Remember the email you signed up with because that's where you'll be receiving your collab invite!
You can view the source code after you accept this invite.
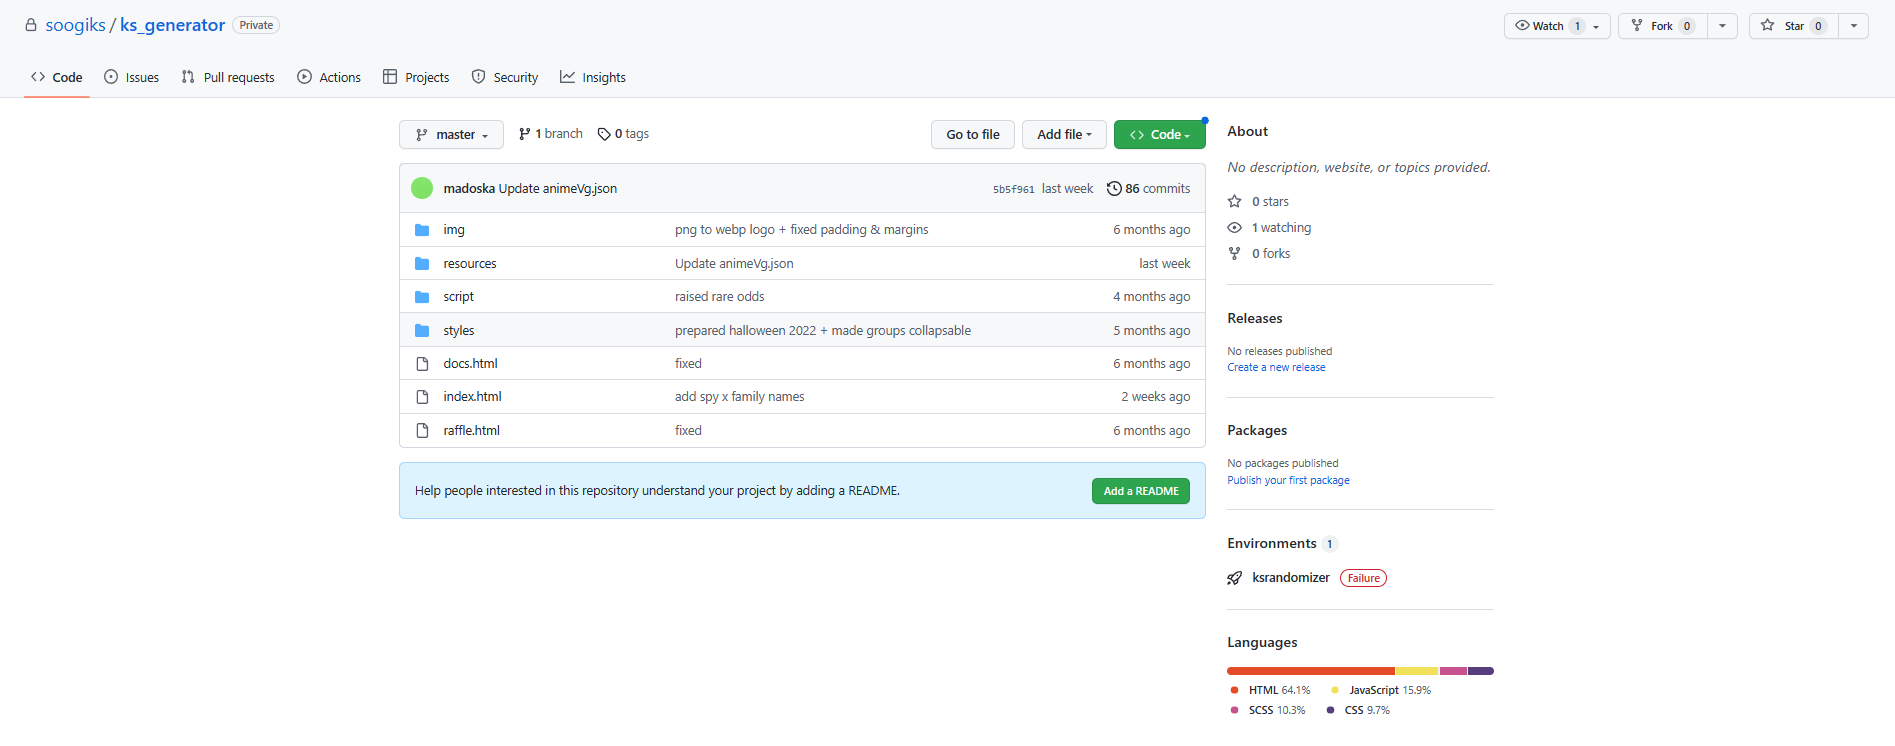
Let's go over what each file/folder contains:
- img: this folder contains images, such as logos and the screenshots in this guide
- resources*: this folder contains all the card decks, in json files
- script: this folder contains the Javascript, in other words the code that does things when you click things. The app.js file contains the randomizer logic. Please don't change anything in these files unless you know what you're doing
- styles: this folder contains the CSS to make things pretty
- docs.html: this file is basically just the page you're looking at right now
- index.html*: this file is the main page, aka the actual randomizer page
You only need the files & folders marked with * to add/modify card decks. Just ignore the rest. You can click on the files and folders to read the contents.
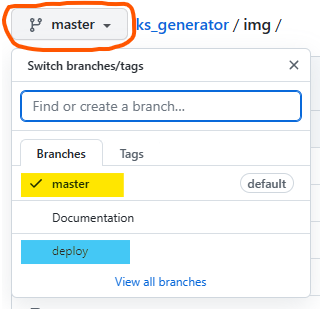
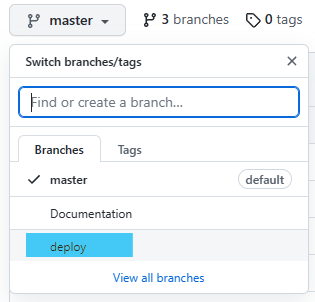
Another thing you want to look at is branches. I won't go too much into what branches are, but you just need to know that for this guide you will only need to know about 2 branches. There is the master branch and the deploy branch. You can see what branch you're currently on by looking at the dropdown menu above the folder list. Default it will say " master", but it can also say something else. You can easily switch between branches using this dropdown.
- The master branch is typically the main branch that will be deployed to the site. However, to keep it simple for those of us who have never worked with git before we will be using the master branch as a sandbox instead. This branch will be pushed to a test site where you can double check that everything works before you push your changes to the actual site
- The deploy is now the branch that is deployed to the real site. All code that is added to the deploy branch must work so if you're
not confident yet, work in the master branch first and then merge to deploy. It sounds more complicated than it is, don't worry I'll explain in a bit

3. Modifying a deck/card
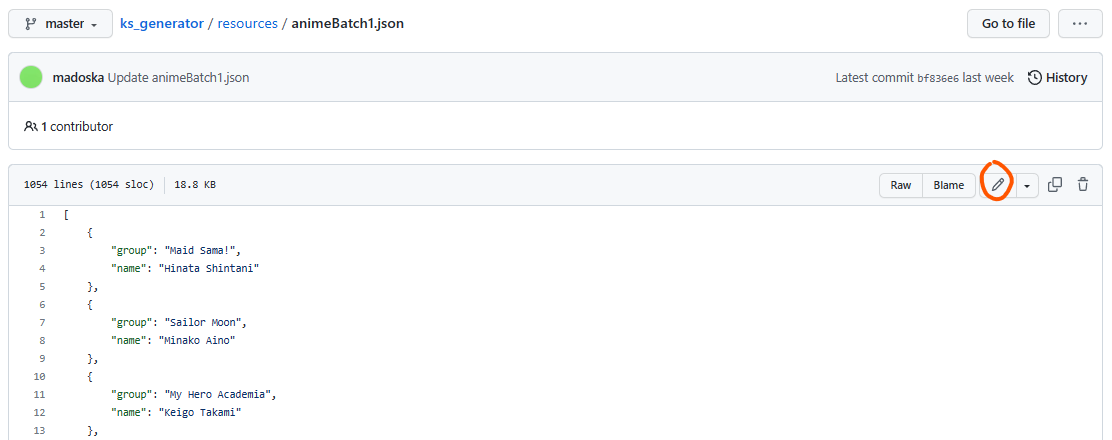
To edit an existing file (remove a card, add a card to an existing deck, fix a typo,...), you simply click on the file name. After the file is opened, click on the little pencil icon.
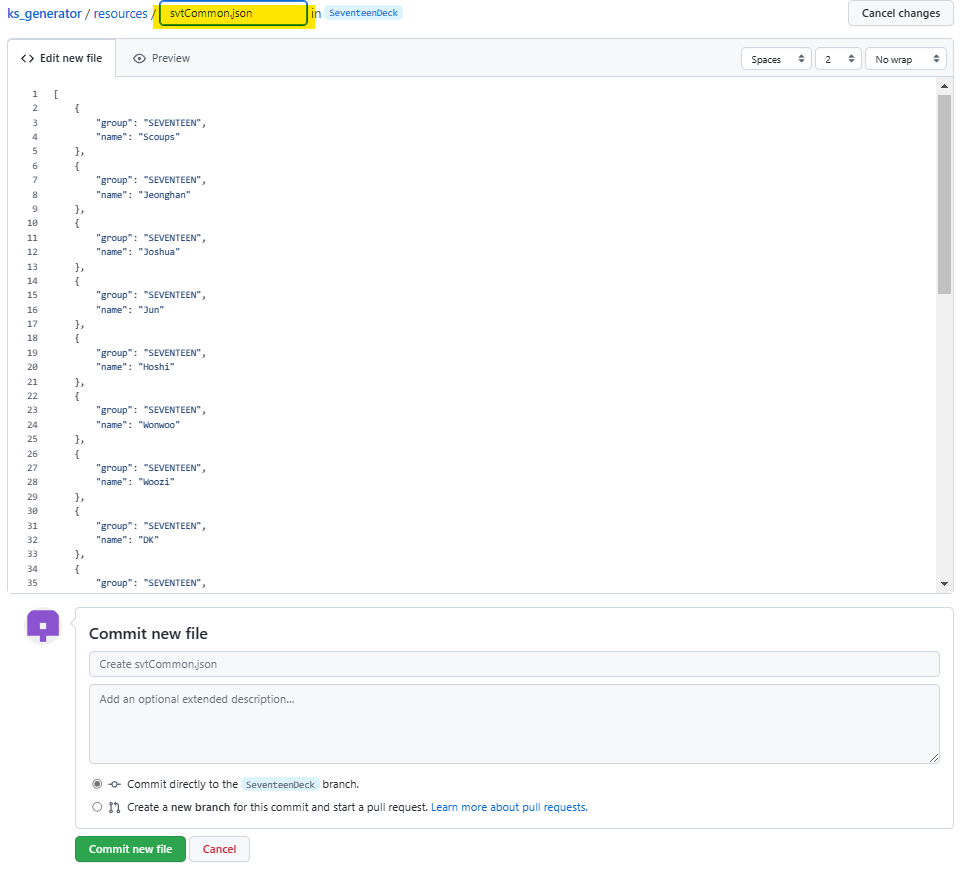
Make your changes, and then scroll to the bottom of the page. You can save changes by "committing" them using the form. Check out the example below.
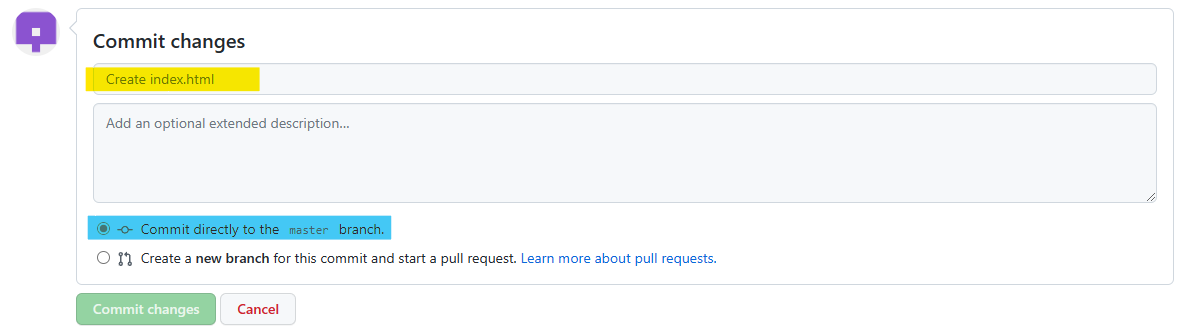
- The first input field (marked in yellow) is optional; this is where you can write a short message explaining the changes you made.
- The blue option will push the changes straight to the branch you're currently on. Default (and in the screenshot) that would be the master branch. Read 2. Access the code for more information about the branches. If you're super confident though you can switch to the deploy branch first and commit directly to that one but do this before you edit the code so you don't lose your work. Click commit changes.
3.1. Merging master into deploy
If you committed directly to deploy you can skip this step, otherwise if you committed to master first the changes should take a few seconds to appear on the test site. Check if everything still works as it should and if there are no bugs, you can go ahead and merge master with deploy. In other words, add all the new changes in master to deploy. Here's how you do that:
- Switch to the deploy branch using the dropdown.
- You should see a warning that says the deploy branch is x number of commits behind on the master branch. Click on it.
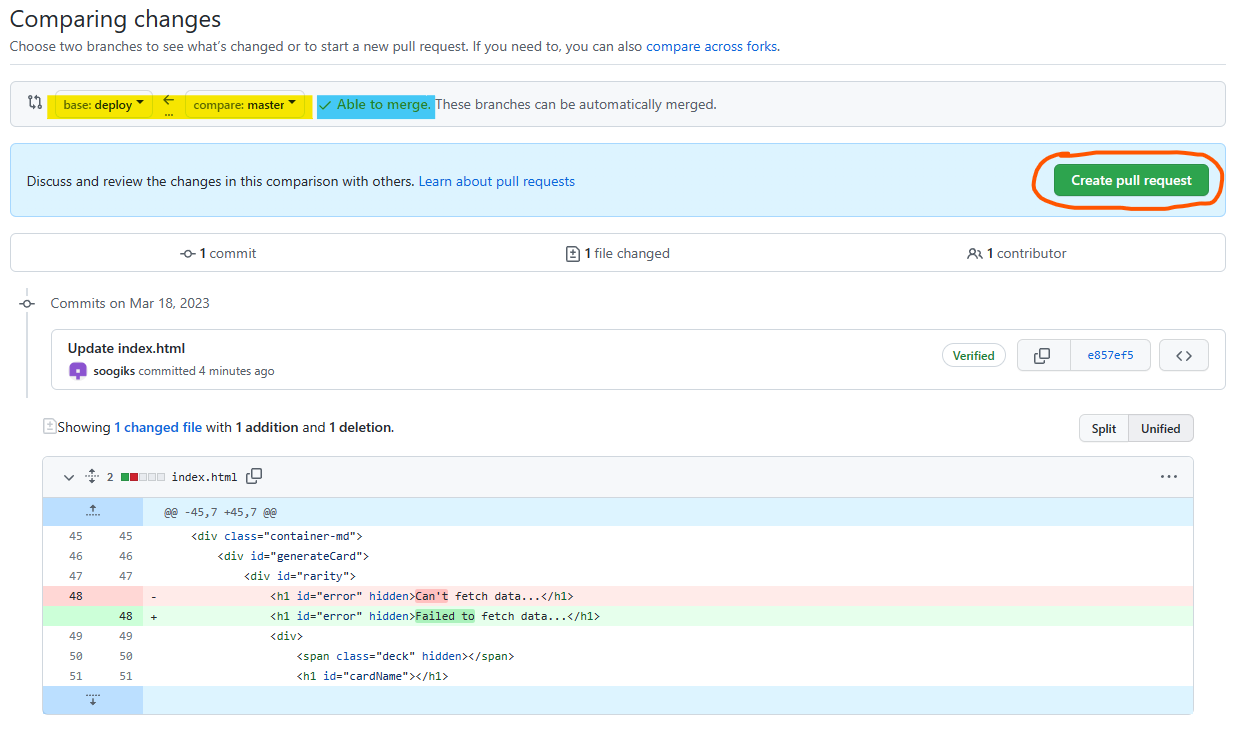
- You will be redirected to a page that lets you compare the changes in the deploy & master branches. First, check that the base branch is set to deploy, and the compare branch to master (marked yellow in picture). Then, check that the branches are able to be merged (marked in blue). If it warns that there are conflicts, do not continue with the merge unless you know how to fix the conflicts and DM Soogi. Otherwise you can click the create pull request button (circled in red).
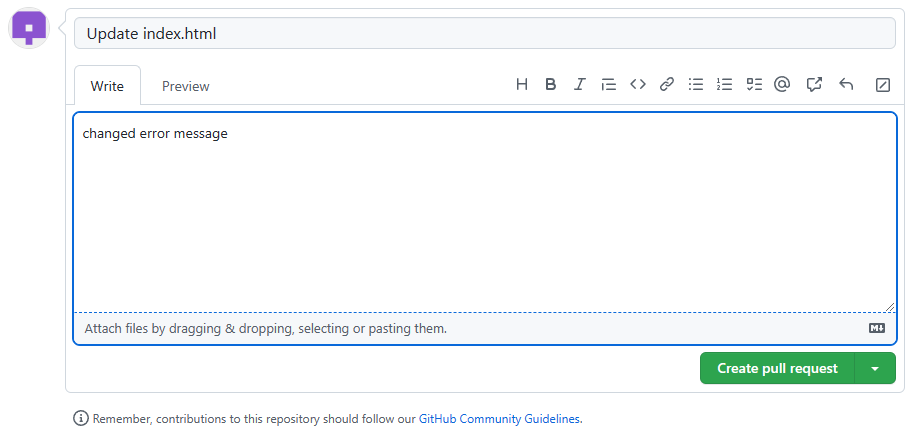
- On the next page, you can add a little note explaining the changes you made if you want and again, click the create pull request button.
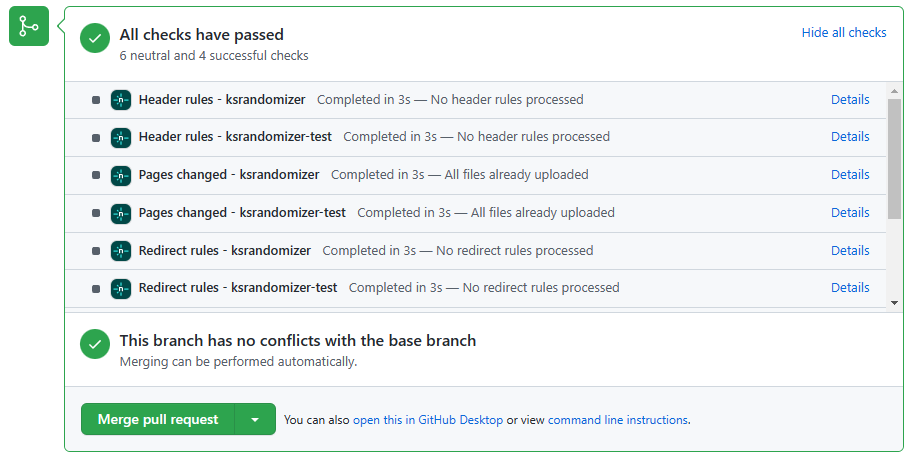
- Finally, you'll be redirected to the pull request page. Github will do some more merge conflict checks, and if everything is alright you can click on the green merge pull requests button. Then click confirm again.
- The merge is completed when the green " open" label turns into a purple " merged" label.


And you're done, the changes should now also appear on the real randomizer site! 
4. Adding new decks/batches
4.1. Formatting the cards
Sometimes you'll want to add new decks or batches to the generator instead of just removing cards or fixing typos. In those cases modifying an existing file is not enough; you'll have to add new files! The process is a little different in that
case...
First you should know that the decks and batches are stored in json files instead of a proper database. Json requires a specific formatting and you could easily write everything out manually, but I'm lazy so I created a
cards compiler sheet that contains an "Export as JSON" plug-in. Basically, you enter all the cards you want and it will
do the formatting for you! Let me explain~
Say, we want to add a deck that contains only Seventeen cards for obvious reasons teehee 
Click on the  icon in the bottom left
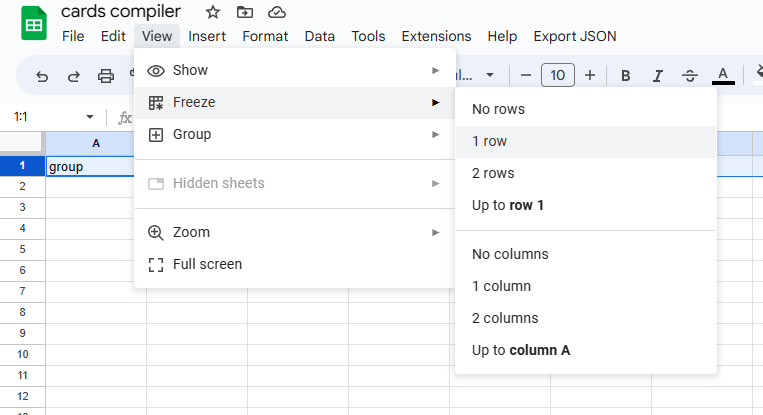
corner to add a fresh new sheet. Literally type "group" in the A1 field, and "name" in the A2 field. Select the entire first row and click View -> Freeze -> 1 Row. I know it seems dumb but you definitely
have to do this or else the randomizer won't know how to display the card names
icon in the bottom left
corner to add a fresh new sheet. Literally type "group" in the A1 field, and "name" in the A2 field. Select the entire first row and click View -> Freeze -> 1 Row. I know it seems dumb but you definitely
have to do this or else the randomizer won't know how to display the card names 
In the group column, you write the group/subunit name OR the soloist name. The name column is reserved for member names OR soloist card numbers. Look at the example below.
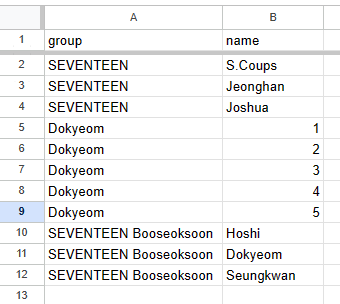
Notice how we write out the group/subunit name for each member? We also write out the soloist name 5 times, for each card number.
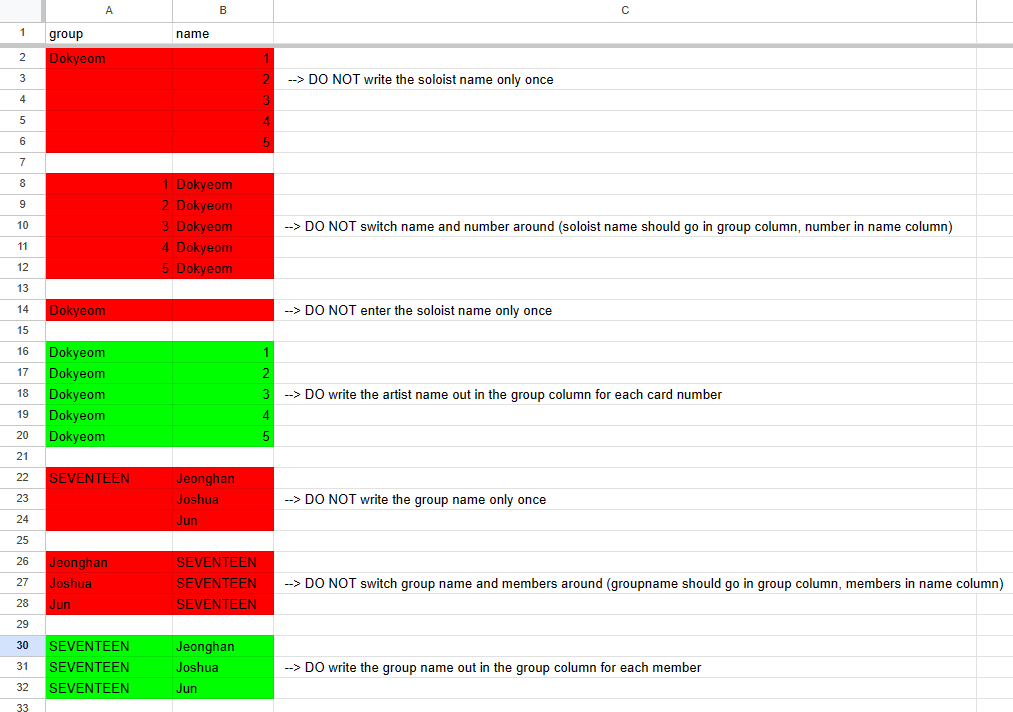
Pictured below is how you should vs shouldn't fill out the sheet.
When you're done, make sure you didn't type anything outside the group and name column (like the DO's and DONT's I added in column C in the screenshot above) and then click Export JSON -> Export for this sheet
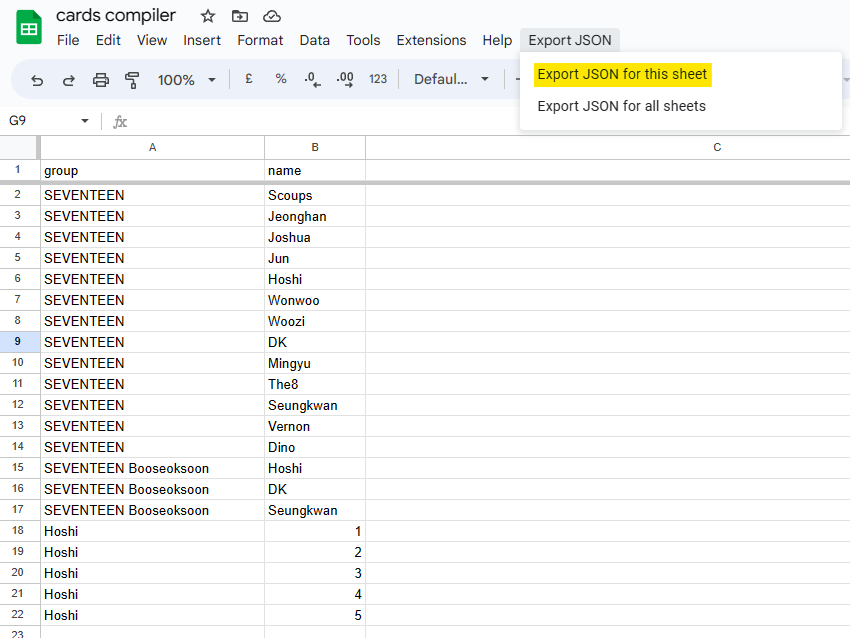
A window will pop-up with all the cards you entered, formatted in JSON. Copy the contents of this window and the prep work is done!

4.2. Adding the cards to a new file
Now that the cards data is ready, go back to Github and first, check what branch you're on. Only switch to deploy if you're confident. Then we can go ahead and add the cards data to new files. To do that, first open the Resources folder and then click Add file -> Create new file at the top of the page

On the "create new file" page, give the file an appropriate and unique name (that hasn't been used by any other files in the resources folder!) and make sure it ends with .json. In the code field, paste the cards data that you formatted in 4.1. Formatting the cards and when you're done, save as shown in 3. Modifying a deck/card. Merging is not necessary just yet, we will do that after we add a button for the card set in the next step.
4.3. Creating a button for the new card set in the randomizer
So you created a new file for the deck/batch in the resources folder. All that's left now is to add a button so you can roll the deck in the randomizer and display a card. To do that, go back to the main page in the Github repository and open
index.html. Click on the  icon and choose which div block the deck/batch fits in best. If you're not sure, just add it to the
korComButtons div and we'll move it somewhere else later. You can recognize a div deck block by the
icon and choose which div block the deck/batch fits in best. If you're not sure, just add it to the
korComButtons div and we'll move it somewhere else later. You can recognize a div deck block by the div class="collapse button show" id="[...]" opening tag marked in
pink in the picture below
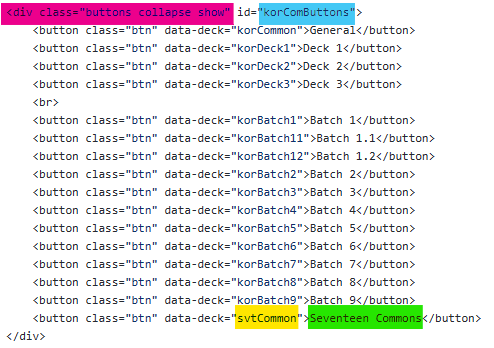
Within that div block, add a new line following this format: <button class="btn" data-deck="[NAME OF THE JSON FILE YOU CREATED FOR THE DECK/BATCH IN STEP 4.2.2.]">[name that you want to show in the button]</button>
For example, earlier we named the json file svtCommon.json, so we type that in the data-deck attribute marked yellow in the picture above. We deck name we want to show in the button on the
randomizer is "Seventeen Commons" so we type that between the button tags marked in green.
Commit this change as well. If you committed to master, merge into the deploy branch as shown in 3.1. Merging master into deploy. The new deck/batch should be available with a clickable button in the randomizer within just a few seconds!
Now go ahead and wipe the sweat off your brow and pat yourself on the back, great job !!
